.png)
Keep It Clean! Google Analytics Configuration Tutorial
This article was originally published at diamondandbranch.com
One of the most important parts of being the person in charge of Google Analytics data reporting is making sure that the data is not polluted. There are several sources that can contaminate data — among these are spammers, internal traffic (yourself), and bots. But poor configuration of the data measurement tools in Analytics is another major reason data can become contaminated. That is why I’m sharing this Google Analytics Configuration Tutorial to make sure that your configuration is on-point, and that you are obtaining the most valuable, accurate data about your website.
#1 Your Google Analytics Information
Before getting the code snippet and uploading it to your website, make sure that the information entered into your Google Analytics account matches your website and your business information exactly. This is because entering incorrect information may cause a loss of data, or affect the information that we receive from the tool.
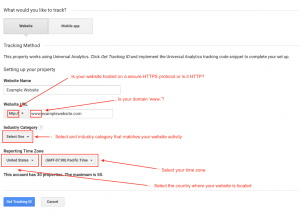
When creating the property in Google Analytics, you’re prompted to select either HTTP or HTTPs. It’s very important to select the protocol where your server is hosted; otherwise, the data that your website visitors are generating is going to be invisible to Google Analytics.For time and date reporting accuracy, also make sure that you enter the correct country and time zone. Here’s an example of the configuration page:
#2 Place the Google Analytics Code Snippet in the Correct Place
There’s a theory that Google Analytics will work no matter where you place the code snippet, but why risk it? To make sure that the tracking code is correctly added to your website, Google recommends that you place the Google Analytics code snippet anywhere in the <head> section of your website.
#3 Filter out your IP address
One of the reasons why we measure Analytics data is because we want to learn how users are interacting with our website — what pages they visited, where they came from, how long they spent on our pages, how many pages they saw on average, etc. However, if you’re including your own visits in that data, you may be looking at incorrect information.
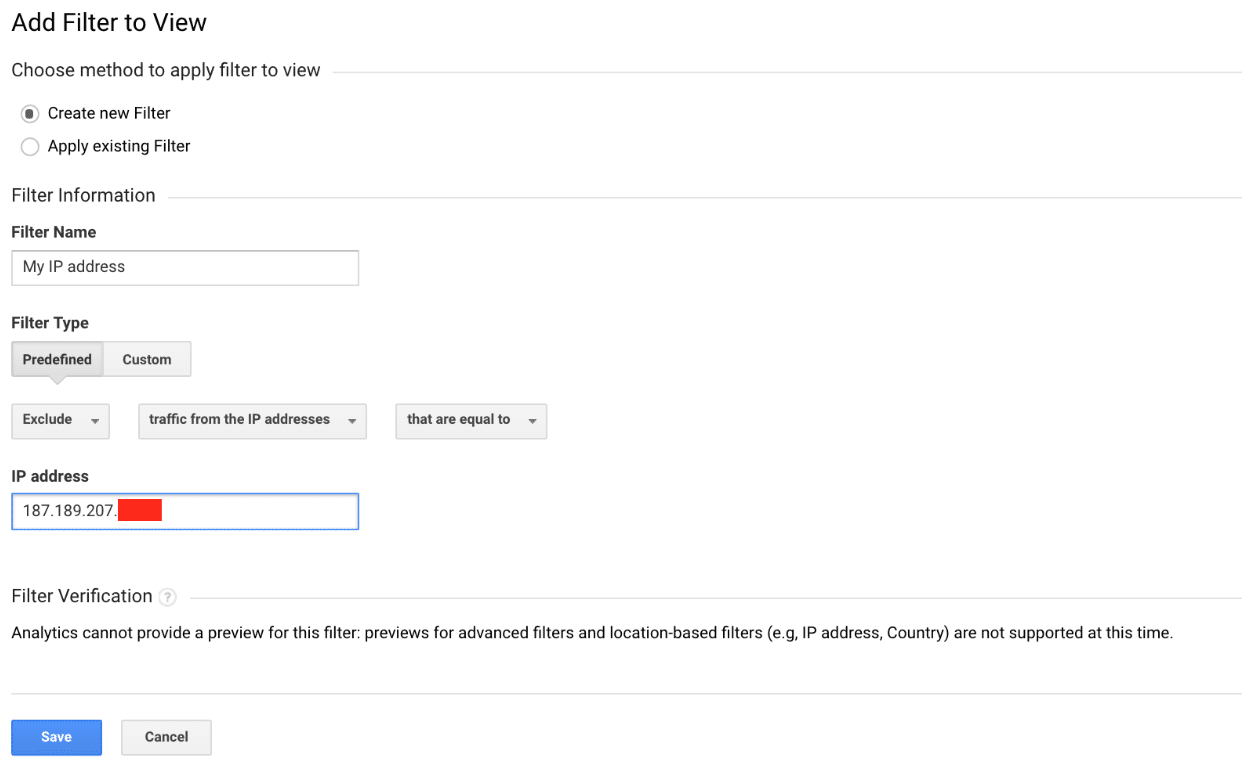
For example, what if you open one of your pages and spend 20 minutes editing it or reading the content to write a blog post? Or what if you visit your website daily just to make sure that it’s not broken? You’re not taking the same actions that an external user and potential lead would, which can contaminate the data. , So, the best thing to do is to exclude your visits by filtering out your IP address.
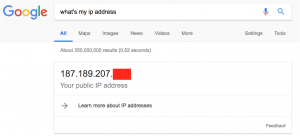
In the Admin section of Google Analytics, there is an option for filters. Click that, then create a filter> you can name it ‘my IP address’ > the Filter Type is ‘predefined’ > ‘Exclude’ > ‘ Traffic from the IP Addresses’ > ‘That are equal to’ >Then, enter your IP address into the box below. If you don’t know your IP address, you can find it easily by Googling ‘what’s my ip address’. The results will show it, and you can copy and paste it right into the box. When you’re finished, click Save.
#4 Data Retention
Recently, Google Analytics changed the options for how long they keep detailed data from accounts. There are options to tell Google Analytics to never delete it or to get rid of the bulk of the data at a specific time. It’s important to remember that this doesn’t mean that if you tell Google Analytics to expire the data in 24 months, that you’re unable to see your history when looking back two years. Instead, it means that only the detailed data will not be available. In other words, Google Analytics will still “remember” the aggregate data for the previous periods, but you won’t be able to see reports for detailed page views, website interactions, etc. You can read more details about these new data retention policies in Google Analytics in this blog post by Krista Seiden, an Analytics Advocate for Google in the SF Bay Area.
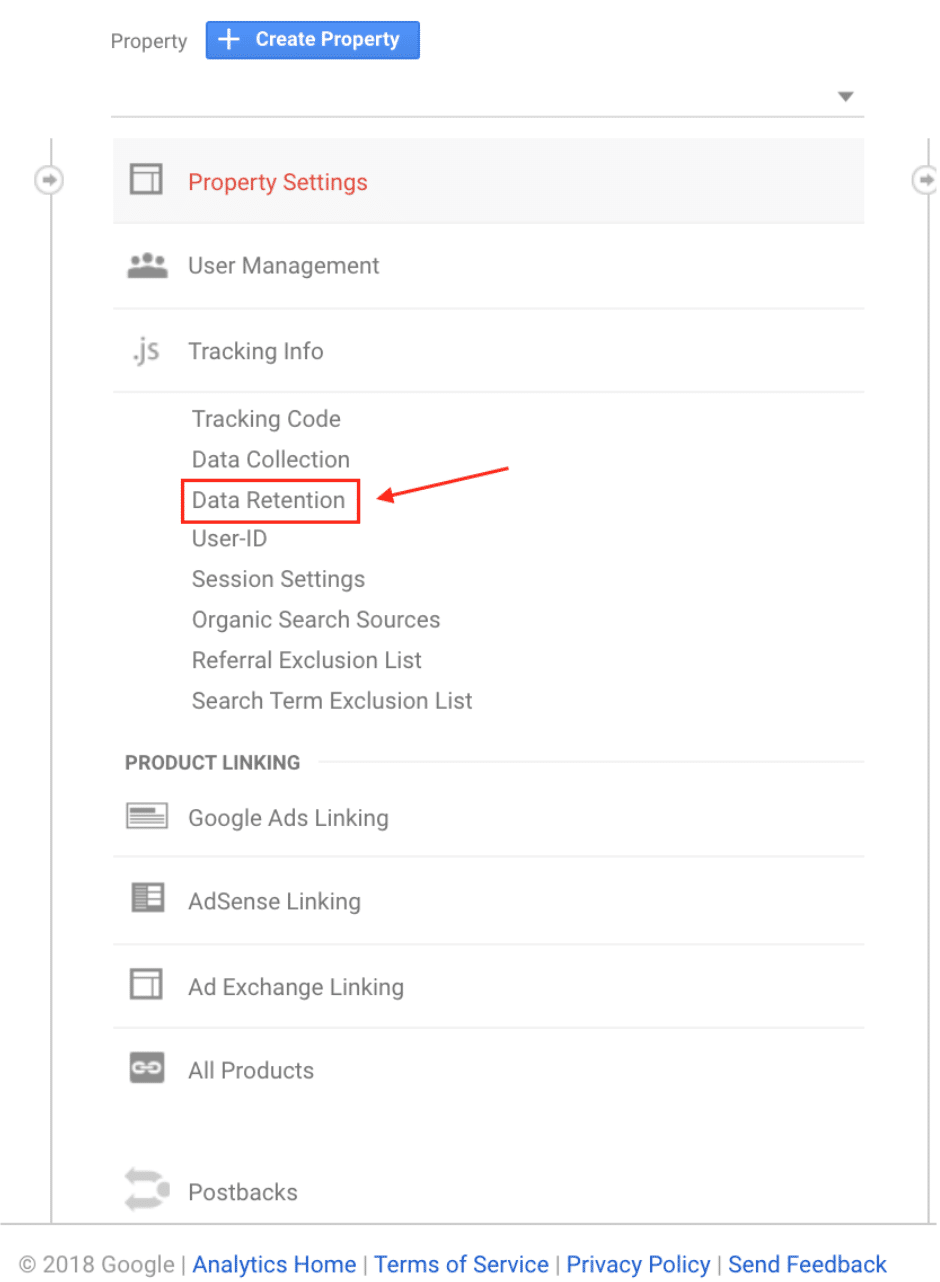
If you’re not prompted to select the default data retention settings, you can find them under the ‘tracking info’ in the property settings, in the Google Analytics admin panel.
Unfortunately, there is no standard recommendation for how long each property should keep the data. This is because each website can vary widely due to things like the business’s physical location as well as the owner’s personal preferences.
#5 Spam Filters
This is a very important one. Spammers love to mess with us, and so they’ll often send traffic to websites that is inconsistent with how users will behave. Just for the fun of it. Awesome, huh?
Spam traffic in Analytics reports is a very broad topic that needs its own post. Here’s an excellent one by Carlos Escalera at Moz.com — he covers all the details of how to efficiently filter spam, bots, & other junk traffic in Google Analytics.
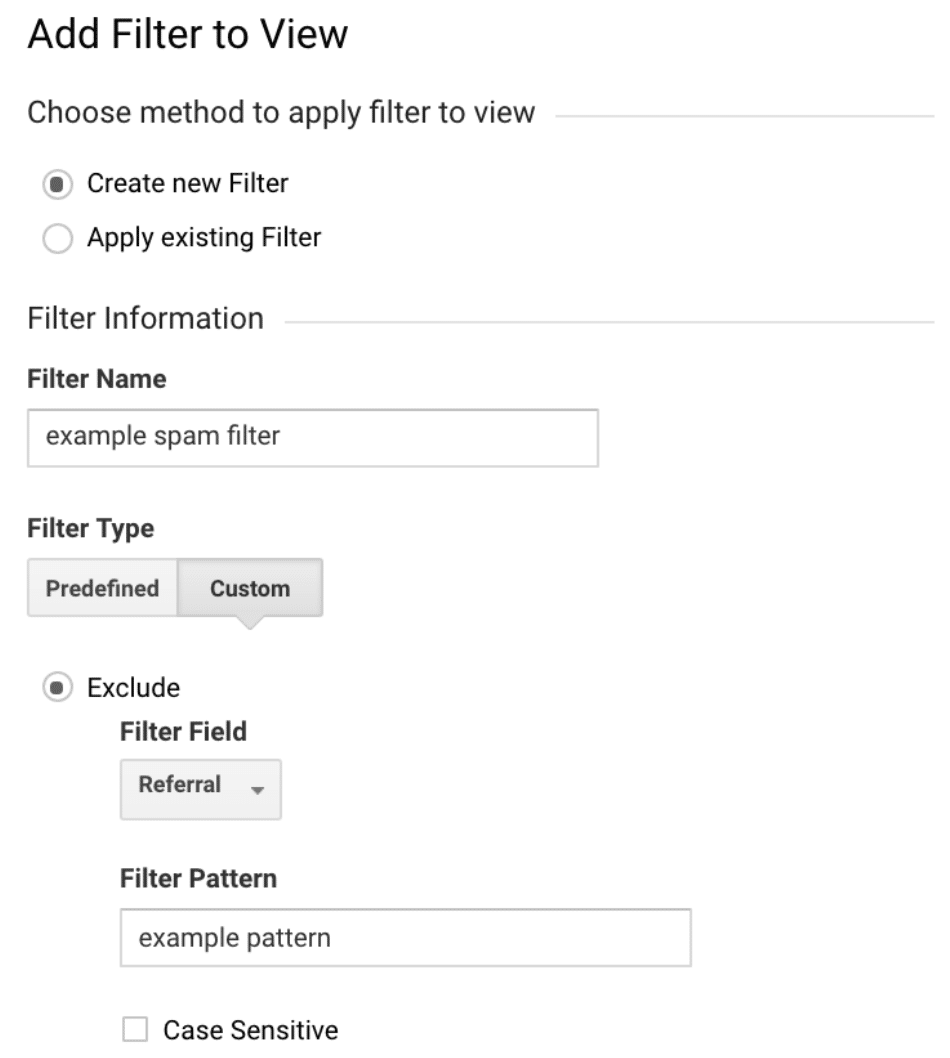
But to start combating spam, you’ll want to create a spam filter for your website. This will be a custom filter where you’ll select the type of data field needed for filtering. For example, you can filter outsources, referrals, language, etc. Select from the ‘Filter Field’ dropdown, and enter the pattern in the box.
#6 Set-up Goals
Google Analytics creates tracking and goal reporting for specific visitor interactions on your website. In the admin section of Google Analytics, under the view of the property that you’re working on, there’s a place to create goals. There are different types of goals, for tracking things like form submissions, button clicks, account creations, Ebook downloads, etc. There are also advanced events that can be created with other tools like Google Tag Manager, but with Google Analytics, goals for destination pages can be created, such as a ‘/thankyou’ page, views of a certain number of pages, sessions lasting more than a certain amount of time, etc.
To create a goal, go to ‘Add a new goal’ > select from a template or custom goal > create a goal name > select the type of goal > and provide the details of the goal (depending on what the action is that the user needs to perform)

#7 Content Groups
Google Analytics gives an option to create a rule to view certain pages grouped together as part of our filters. For example, if you sell clothes and accessories, you may want to group together pages for t-shirts, shirts, belts, and jeans. This way, you can see how well these pages are performing together.
To create a group, simply select ‘Content Grouping’ from the view options in the Google Analytics admin panel. Then > ‘New Content Grouping’ > ‘Name’ whatever the group will be about > You can track by tracking code, by ‘extraction’ (which will allow you to look for any URL variables), page title, content description value, or by a custom definition. This is the easiest option if you’re using a sub-folder filter. For instance, , if you’re going to group together the different pages of the men’s clothing website, you may want to add the sub-folders for the different categories (/belts/, /shoes/, /jeans/, etc.).

#8 Connect other Google accounts
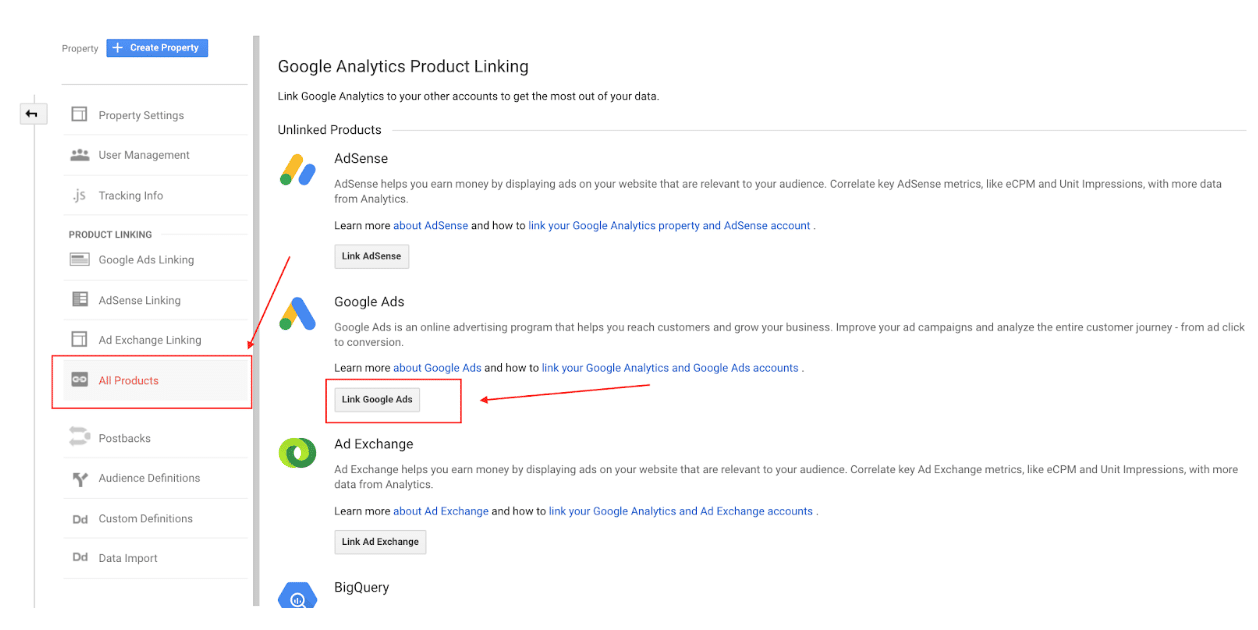
The beauty of using different Google accounts is that they can all be connected on the Analytics side to monitor the traffic together as a whole. For instance, you can connect a Google Search Console account and an Adwords account to show total organic traffic, as well as paid campaign traffic reports in Google Analytics.
To connect these accounts, go to the Google Analytics admin panel. Under ’property settings’ > find ‘All Products’ > Select the product that you want to link –this will take you to a different screen where you can select the account that you’re linking. Once you authorize it, the data will merge with your Google Analytics account!
#9 User Access
Different users need different levels of access. Creating a user with limited access is the best way to prevent multiple users from altering your Analytics configuration, or adding any filters or goals.
To add a user, go to the Google Analytics admin panel, then under the property settings list find ‘User Management’ > Click on the blue circle with the ‘+’ sign. Here, you can add a group or a new user (groups are only available for Google Marketing Platforms) > in the next screen (to add a user) enter their email address, then select the permissions for the new user. If you’d like them to have limited, read-only access, select ‘Read & Analyze.’ If the user has full access rights, all three checkboxes should be selected.

The above list of recommendations is in order of importance, to ensure that the most critical information is at the beginning. After you’ve gotten that tightened up, you can begin doing things like creating goals, connecting Google accounts, and giving access to other users. Following this list ensures that you will have strong, accurate Analytics data regarding the use of your website, which you can use to understand your users’ behaviors and make important business and marketing decisions accordingly.


.png)
